

Download – https://www.patreon.com/posts/61712442
Ref – https://bit.ly/3IHWX9r
👉👉 If you Liked it – http://bit.ly/2UZmiZ4
Channel Ashif – http://bit.ly/3aYaniw
Support me on – https://www.patreon.com/Ashif
Support me on – paypal.me/9953280644
Dissolve in UE4 Material Tutorial | Download Files
#cghow #UE5 #UE4Niagara #gamefx #ue5niagara #ue4vfx #niagara #unrealengineniagara #realtimevfx
●Upload Your Tutorials/Work – https://cghow.com/
Purchase Effect Package From Unreal engine Marketplace –
Unreal Engine Niagara Effects in Marketplace – https://youtu.be/DF4Lb_btEus
Niagara Effects Pack in Marketplace – https://youtu.be/g6_k8T7FqHA
Unreal Engine Advanced Magical Effects in Marketplace – https://youtu.be/0Dn3GLIzhMo
Smoke in UE4 Niagara Pack01 in Unreal Engine Marketplace – https://youtu.be/38BPA_9yqJ8
UE4 Niagara Fire Pack 01 in Marketplace – https://youtu.be/PW5FL-zZoP4
UE4 Niagara Fire Pack 02 in Marketplace – https://youtu.be/fdLXPlUEzxM
UE4 Niagara Explosions Pack 02 in Marketplace – https://youtu.be/dj-XX9he4aE
Unreal Engine Niagara Effects Pack 03 in Marketplace – https://youtu.be/0kKon43I-Og
Slow Motion Explosion in UE4 Niagara Pack 04 in Marketplace – https://youtu.be/lUK1eW5zRP0
Unreal Engine Niagara Effects pack 04 in Marketplace – https://youtu.be/MihWYB31Gi4
Slow Motion Explosion in UE4 Niagara Pack 04 in Marketplace – https://youtu.be/lUK1eW5zRP0
UE4.25 Niagara Effects Pack 05 in Marketplace – https://youtu.be/sn1HIENVTDI
UE4.25 Niagara Effects Pack 06 in Marketplace – https://youtu.be/pvH_xGQ5jvs
Explosions Package in Unreal Engine Niagara Particle System – https://youtu.be/1mbqWscjUJ4
●Follow FB Page – https://www.facebook.com/cghow0/
●Join FB Group – https://www.facebook.com/groups/cghow/
●Android App – http://bit.ly/2XUnhoR
Playlists-
●Unreal Engine Niagara Tutorials – http://bit.ly/2SmPEuT
●Unreal engine VFX Tutorials -http://bit.ly/2JNXyJZ
●Unity VFX Tutorials – http://bit.ly/2XNGlKz
Hi guys, I am Asif Ali and you’re watching CGHOW.
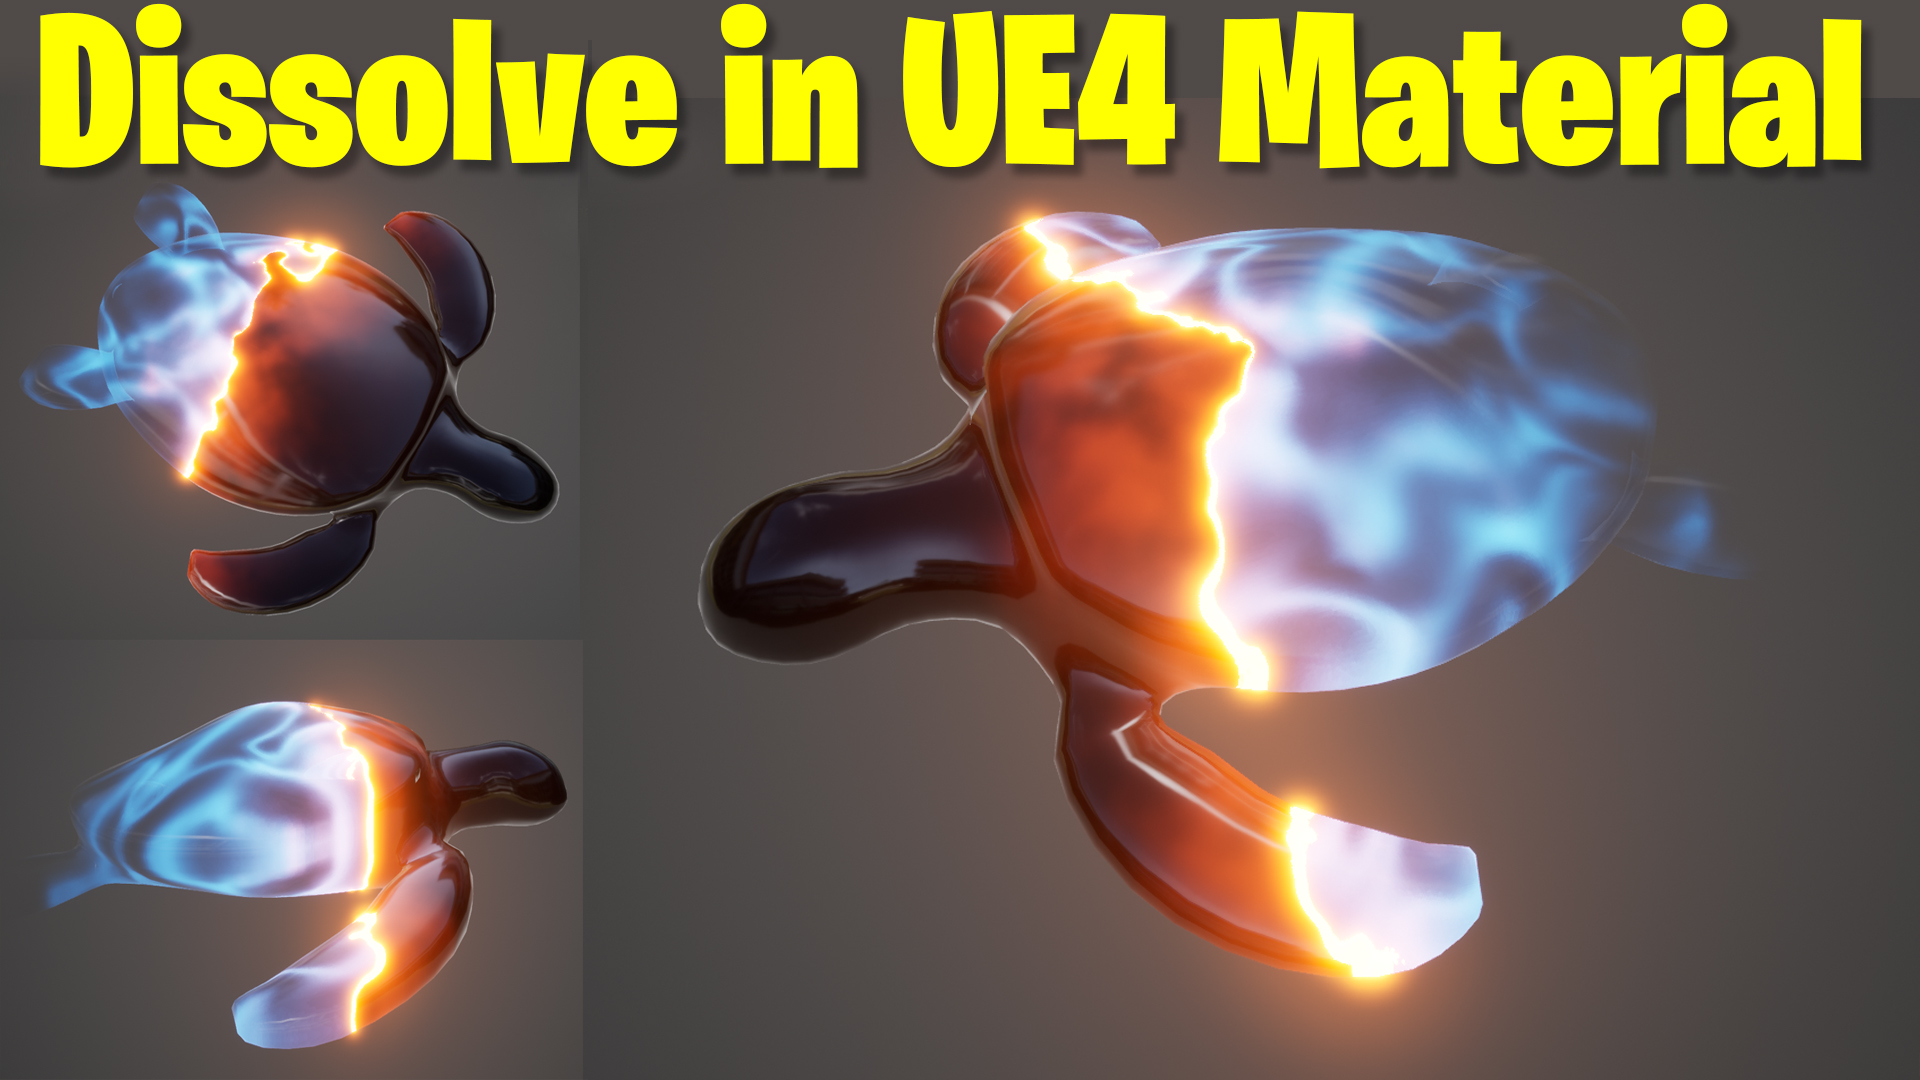
Today, I’ll show you how to create a dissolve material effect in UE4.
This tutorial focuses on materials, not Niagara, and is inspired by a cool reference I found in Blender (link in description). I’ll try to replicate a similar dissolve effect here in UE4’s material editor.
If you haven’t subscribed yet, please do so, and don’t forget to like, share, and comment. Let’s get started!
Setting up the Model
- Import the Model:
- Open Unreal Engine and import a low-poly turtle model from Maya.
- Check the UVs to ensure they are well laid out and smooth the model for better visuals.
- Material Setup:
- Create a basic reflective black material for the turtle with slight metallic and specular values. This will serve as the base material.
Creating the Dissolve Effect
- Initial Material Setup:
- Use a translucent material type and enable double-sided to allow for better dissolve effects on both sides of the mesh.
- Translate to Volume for a smoother dissolve effect.
- Dissolving Using UVs:
- To dissolve from one side to another, use local position or UVs to map the dissolve area. In this case, use the green channel for the dissolving effect.
- Add a color blend node and connect it to the alpha channel to control the dissolve.
- Noise for Distortion:
- Introduce noise texture to distort the dissolve line for a more organic effect. Use a multiply node to control the strength of the distortion.
- Use the green channel for the cold part of the effect and apply the noise for further adjustments.
Adding Core, Burn, and Blue Effects
- Core Line (Burning Effect):
- Create a glowing core using an emissive material. Control the glow using a parameter for thickness and offset to animate the effect.
- The core should have a burning red color and can be animated using a sine wave to give the illusion of the dissolve spreading.
- Blue Dissolve Effect:
- For the blue part (the back layer), use a blurred texture to create a soft glowing effect. Apply world alignment to ensure proper mapping.
- Add an additional noise texture for distortion on the blue part to make it more dynamic.
Final Touches and Animation
- Glow and Width Adjustment:
- Duplicate the blue layer and apply a white glow on it to simulate the aura effect.
- Use a power node to control the width of the glowing area and adjust the intensity.
- Animating the Dissolve:
- Control the speed of the dissolve by using time and sine nodes.
- Adjust the offset to animate the dissolve effect from left to right or vice versa.
- Adjusting Tiling and Distortion:
- Fine-tune the UV tiling to achieve the desired dissolve effect with more natural seams and variation.
Conclusion
- Material Cleanup:
- Clean up the material by removing unnecessary nodes and ensuring that the dissolve effect looks as intended.
- Make sure the dissolve effect animates smoothly and that all layers (core, blue, and burning effect) behave as expected.
- Adjust Parameters:
- Adjust parameters for thickness, glow, and width to finalize the look.
- Test different values to get the desired effect, whether it’s faster dissolving or a more dramatic burning effect.
Thanks for watching!
Feel free to check out the Blender reference in the description and experiment with this dissolve effect in your own projects. Don’t forget to like, share, and subscribe for more tutorials!
Leave a Reply