
Download – https://www.patreon.com/posts/89107150
Patreon- https://www.patreon.com/Ashif
NFT – https://opensea.io/CGHOW
Twitter – https://twitter.com/cghow_
👉👉 If you Liked it – http://bit.ly/2UZmiZ4
Channel Ashif – http://bit.ly/3aYaniw
Support me on – paypal.me/9953280644
Dissolve With WPO Material in UE5.3 Tutorial | Download Files
#cghow #UE5 #UE4Niagara #gamefx #ue5niagara #ue4vfx #niagara #unrealengineniagara #realtimevfx
●Visit – https://cghow.com/
Unreal Engine Marketplace – https://bit.ly/3aojvAa
Artstation Store – https://www.artstation.com/ashif/store
Gumroad – https://cghow.gumroad.com/
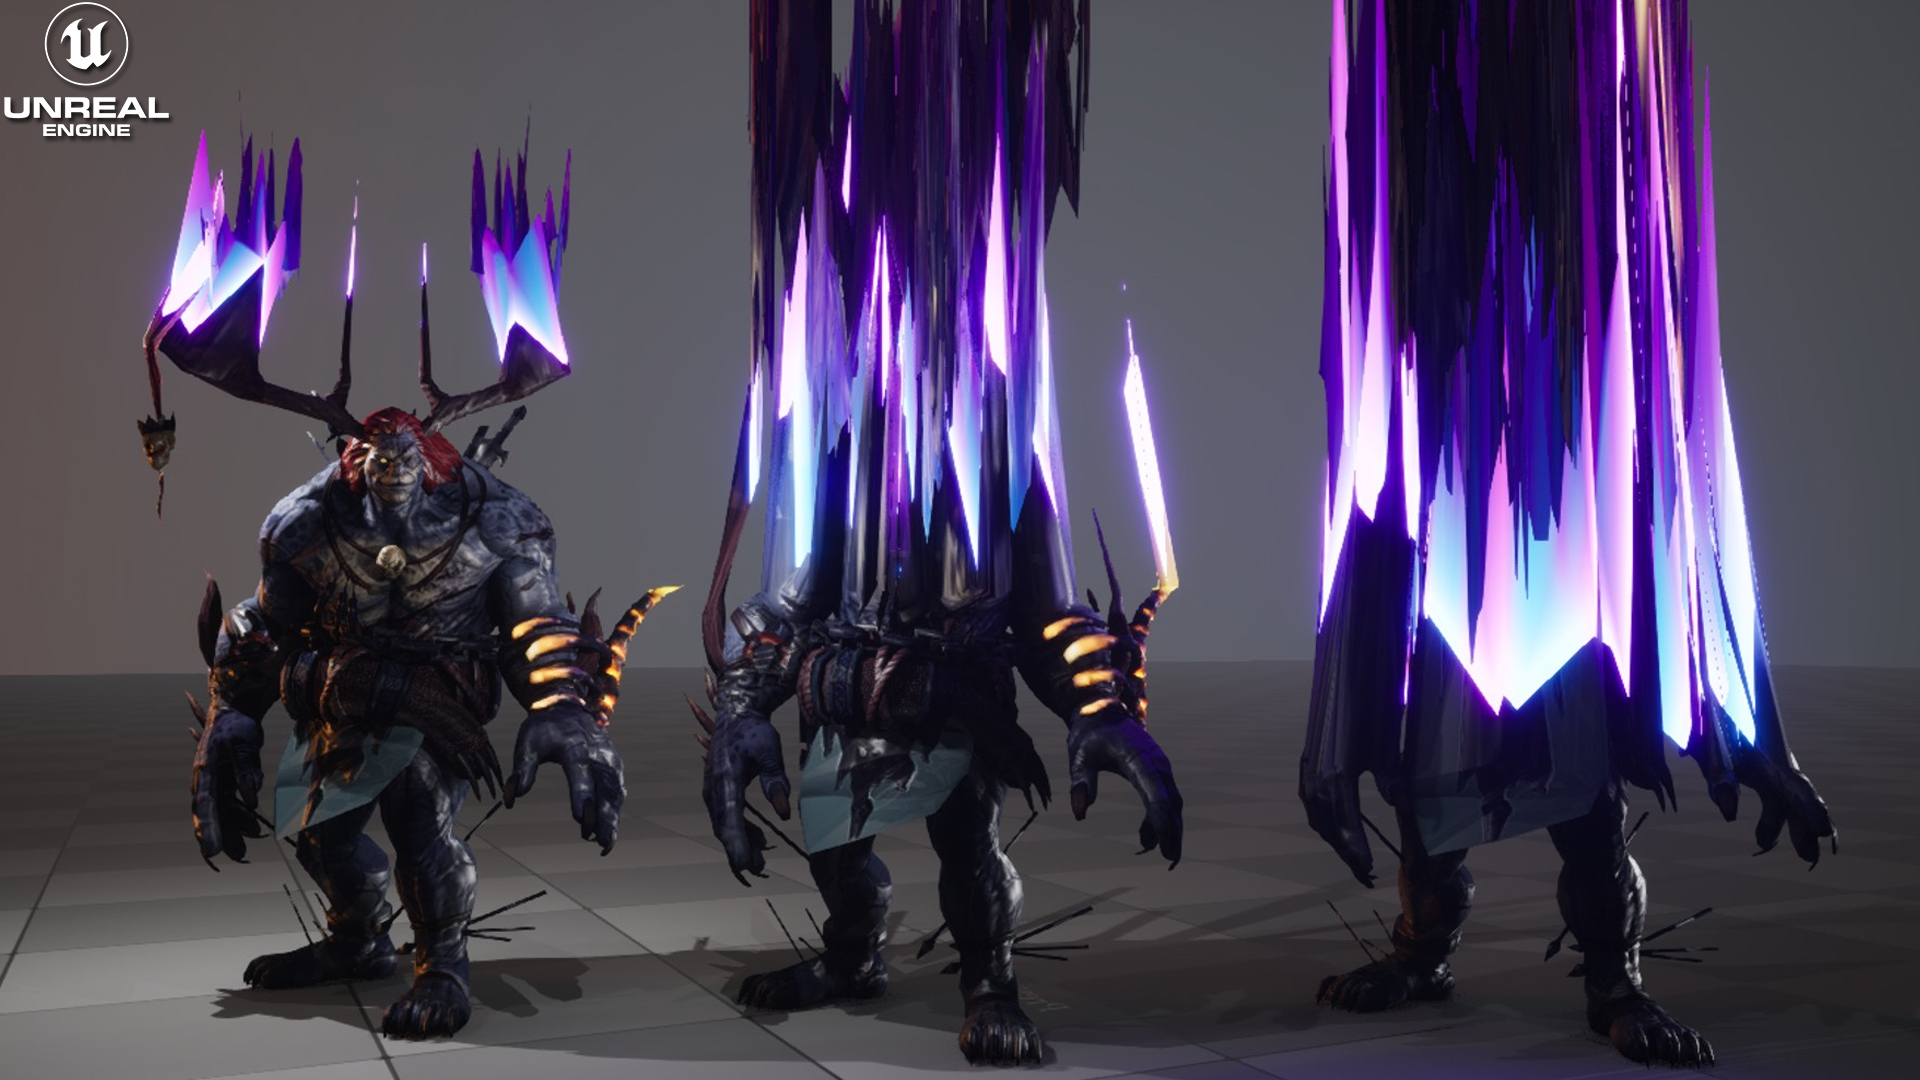
Creating a Dissolve Effect in Unreal Engine 5.3 Using Materials
Description: In this tutorial, Ashif Ali shows how to create a stunning dissolve effect in Unreal Engine 5.3 using materials. This dissolve effect can be applied to any mesh, allowing for a versatile, reusable solution for creating characters or objects that seem to dissolve or fade away. By manipulating the material properties and using noise textures, gradients, and parameters, Ashif demonstrates how to control the dissolve process and make it customizable. This effect can add an extra layer of visual appeal and is perfect for use in dynamic games or scenes. Let’s break down how to set it up step by step.
Key Notes:
- Start with a base material: Begin by duplicating your original material, so you don’t alter the default setup. You can use a simple material with textures like diffuse, specular, emissive, and normal.
- Create a gradient: Use a “Bound” node to create a gradient effect on the mesh. This works for any mesh, whether it’s a sphere, box, or character model, and will allow for a gradient effect on the Z-axis (vertical) or other axes as needed.
- Animate the dissolve: Add a gradient mask to the material and animate the dissolve effect by adjusting the mask with a power node for contrast. Control the speed and intensity of the dissolve by using parameters for greater flexibility.
- Add noise for randomness: Introduce a noise texture to add variation to the dissolve effect. This helps make the dissolve appear more natural, creating an organic and randomized motion as the object dissolves.
- Control the color and intensity: By multiplying the mask with color values, you can control how the object dissolves with the desired hue and intensity. Adjust the blue color, brightness, and power parameters to fine-tune the effect.
- World Position Offset (WPO): To distort the dissolve effect and make it appear as though the object is dissolving in space, connect the noise texture to the World Position Offset. This adds more randomness and helps to create the illusion of the object “melting” or disintegrating.
- Create material instances: After creating the material, make an instance of it for easier parameter tweaking. This allows you to quickly adjust parameters like the dissolve speed, color, and noise strength without re-editing the base material.
- Scaling the dissolve: You can scale the object during the dissolve effect by using the object’s world position and multiplying it with a scaling factor. Control which axis the object scales on, typically the X and Y axes, to create a more subtle scaling effect during the dissolve.
Tags:
- Unreal Engine 5
- Dissolve Effect
- Material Creation
- VFX
- Mesh Effects
- World Position Offset
- Noise Texture
- Gradient Material
- Custom Material Tutorial
Additional Notes: This dissolve effect is highly customizable and can be applied to any mesh in your Unreal Engine 5 projects. It’s perfect for creating a magical fade-out, a destruction effect, or simply adding a stylish visual transition for objects in your scene. The combination of gradients, noise, and scaling can give a very realistic dissolve effect that reacts differently depending on the object it’s applied to. The beauty of this effect lies in its simplicity and flexibility, offering a lightweight solution that can enhance your visuals without being resource-heavy.
Leave a Reply