

Patreon- https://www.patreon.com/Ashif
NFT – https://opensea.io/CGHOW
Twitter – https://twitter.com/cghow_
👉👉 If you Liked it – http://bit.ly/2UZmiZ4
Channel Ashif – http://bit.ly/3aYaniw
Support me on – paypal.me/9953280644
Fix Mesh Crack in UE5 Material using Blender
#cghow #UE5 #UE4Niagara #gamefx #ue5niagara #ue4vfx #niagara #unrealengineniagara #realtimevfx
●Visit – https://cghow.com/
Unreal Engine Marketplace – https://bit.ly/3aojvAa
Artstation Store – https://www.artstation.com/ashif/store
Gumroad – https://cghow.gumroad.com/
Hi guys, I’m Ashif Ali, and you’re watching CGHOW!
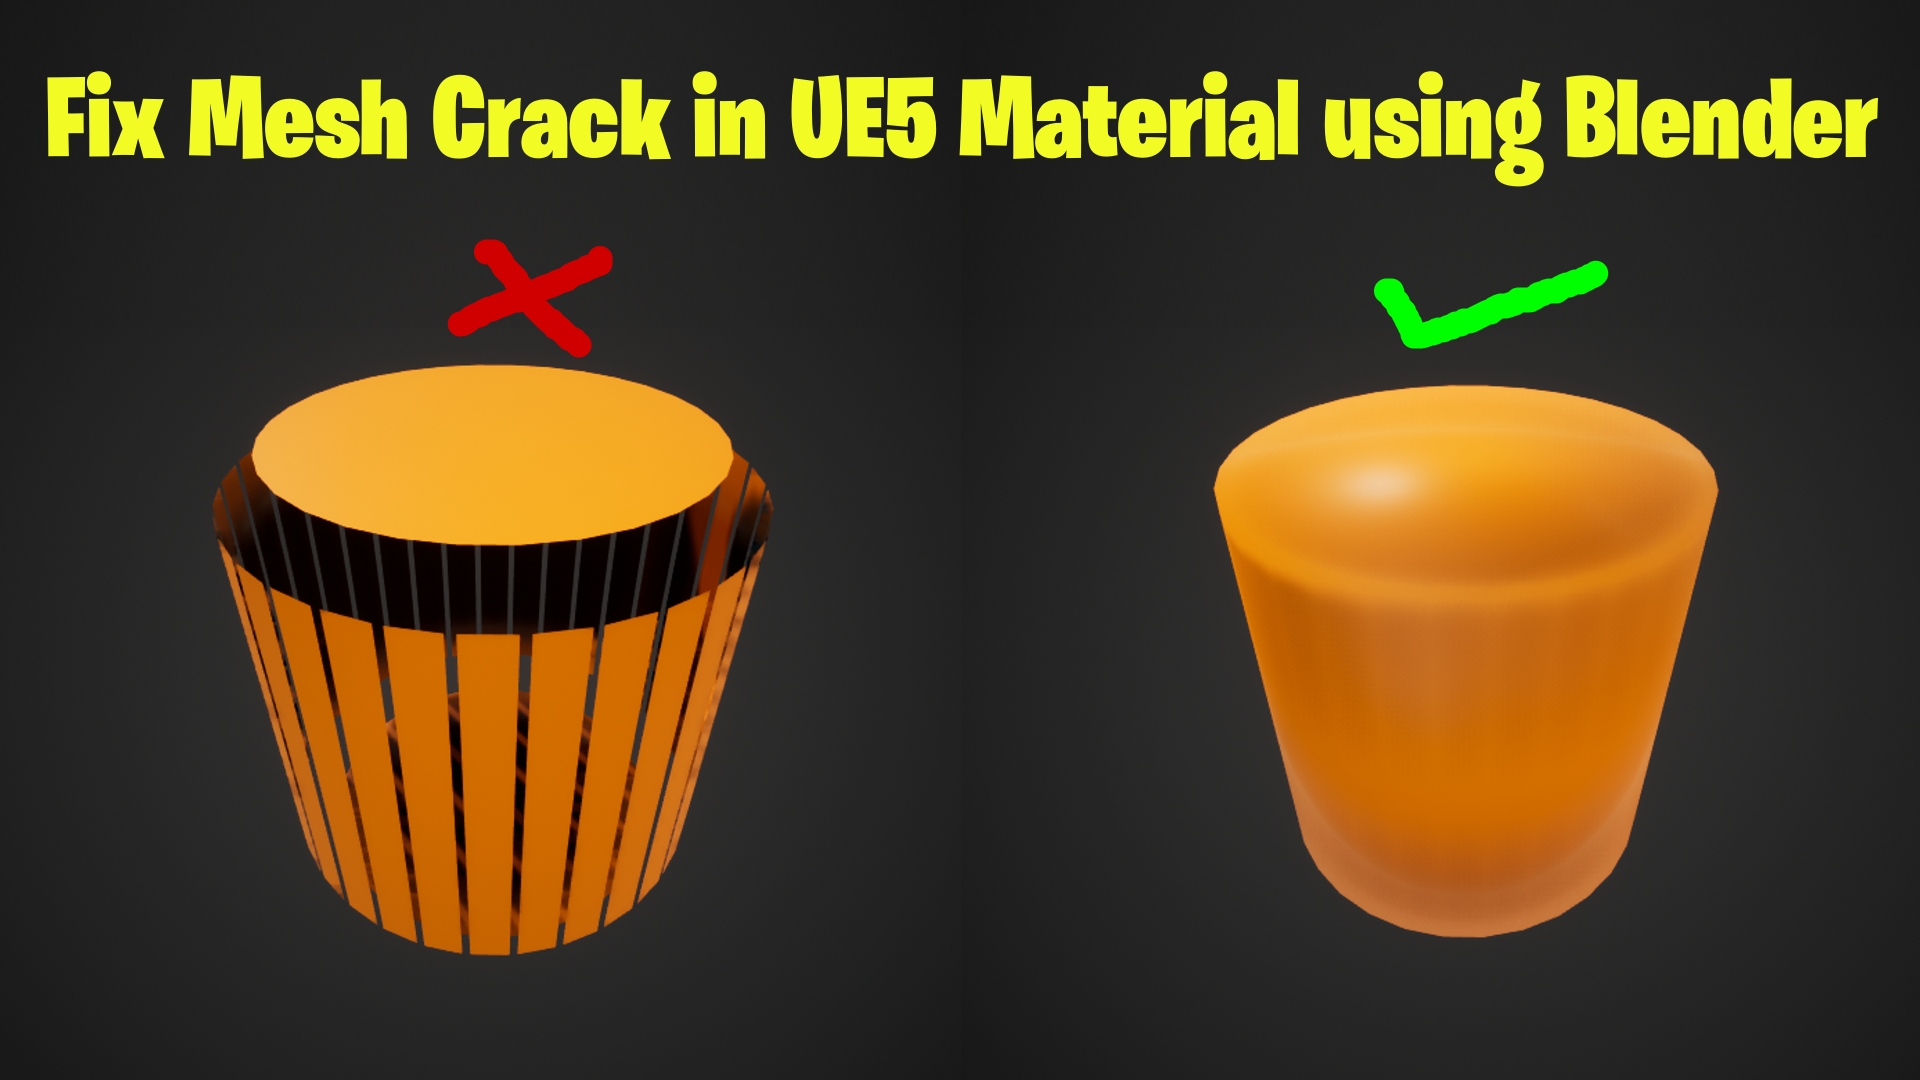
In today’s video, I’ll be showing you how to fix mesh separation issues in Unreal Engine when exporting from Blender. Let’s dive in!
Step 1: Create the Mesh in Blender
First, let’s create the mesh. I’m going to use Blender for this. You can take a Torus or a Cylinder and delete the face. Let’s go to Face Mode, select the face, and press Delete.
Now, press Tab to go back to Object Mode. Scale the mesh by pressing S, then scale on the Z-axis by pressing S and Z.
Step 2: Export the Mesh
Once you’re happy with the mesh, it’s time to export it. Press S to scale it down a bit and then export the mesh. Go to File > Export > FBX, and save it on your desktop. Let’s name the file “CuteRing01”.
Step 3: Import the Mesh into Unreal Engine
Now, let’s jump into Unreal Engine. Import the FBX file we just exported. After importing, you’ll see the mesh in your content browser.
To view it properly, create a material and apply it to your mesh. Set the Base Color to something like orange. Also, don’t forget to make it two-sided to ensure both sides of the mesh are visible.
Step 4: Apply Vertex Normal Adjustment
Next, we’ll modify the vertex normals. We want the faces of the mesh to move in the direction of their normals. In the Material Editor, take the Vertex Normal and multiply it by a value.
For example, let’s multiply by 5. This will push the mesh in the direction of its normals, but you might see some cracks where the faces separate.
Step 5: Troubleshooting the Separation Issue
Even though the mesh is not physically separated in Blender, the faces may still appear separated in Unreal Engine. Here’s how to fix that.
In Blender, select your mesh, go to Tab, and in Edit Mode, select the vertices. If you move them, you’ll see that they are still connected. You can merge them by pressing A to select all vertices, then press M and choose Merge by Distance.
However, this still doesn’t fix the issue entirely. Even if you apply a Subdivision Surface Modifier in Blender, export the mesh again, and re-import it into Unreal, you’ll still face the same separation issue.
Step 6: The Fix – Shade Smooth
Here’s the simple fix: In Blender, right-click on your mesh and select Shade Smooth. This option is available in most 3D software, and it smooths out the shading without changing the mesh geometry.
Once you’ve shaded the mesh smooth, export it again. Now, when you import it into Unreal Engine, you’ll see that the mesh looks correct and the faces stay connected.
Step 7: Additional Mesh Example
Let me show you another example. If I take a default Cylinder in Blender, delete the face, and then apply Shade Smooth, it will fix the issue with the top and bottom faces separating. Let’s re-import that mesh into Unreal, and you’ll see that everything is working perfectly!
Conclusion
And that’s it! You’ve learned how to fix mesh separation issues by applying Shade Smooth in Blender before exporting to Unreal Engine. Now, your meshes will look smooth and connected without separation.
Leave a Reply