

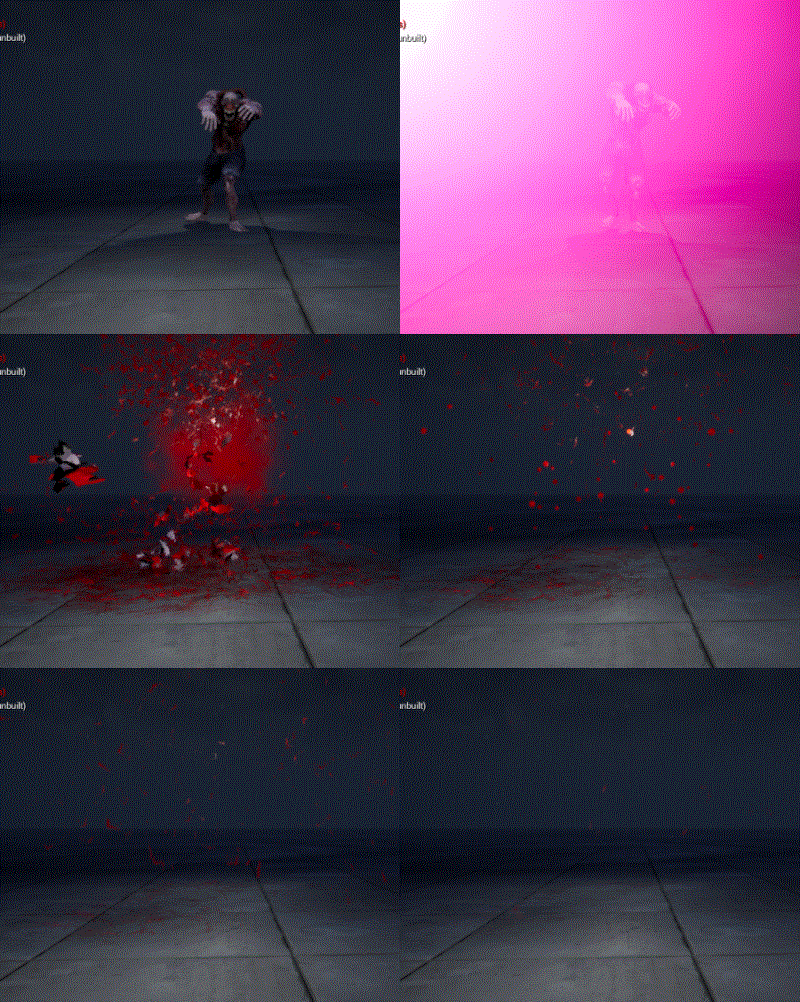
In this tutorial you will learn how to create Hit Blood Impacin unreal engine. you will learn every step for this effect texture, materials, mesh and emitters. For any concern comment below the video or create help thread in CGHOW form (discussion & help forum link below)
#unrealenginevfxtutorials #cghow #unrealengine #gamevfx #gamefx #ue4vfx #ue4fx #niagara #unrealengineniagara
●Upload Your Tutorials/Work – https://cghow.com/
…………………………………………………………………………………………………………
Purchase Effect Package From Unreal engine Marketplace –
●Niagara Effects Pack – http://bit.ly/2LWgZTx
●Advanced Magical FX – http://bit.ly/2XQYyXL
……………………………………………………………………………………………………………………………………
●Patreon – https://www.patreon.com/Ashif
……………………………………………………………………………………………………………………………………
●Follow FB Page – https://www.facebook.com/cghow0/
●Join FB Group – https://www.facebook.com/groups/cghow/
……………………………………………………………………………………………………………………………………
●Android App – http://bit.ly/2XUnhoR
……………………………………………………………………………………………………………………………………
Playlists-
●Unreal Engine Niagara Tutorials – http://bit.ly/2SmPEuT
●Unreal engine VFX Tutorials -http://bit.ly/2JNXyJZ
●Unity VFX Tutorials – http://bit.ly/2XNGlKz
……………………………………………………………………………………………………………………………………
●Discussion & Help Forum – http://bit.ly/2Lo0Er7
……………………………………………………………………………………………………………………………………
Creating a Hit Impact & Bloody Effect in Unreal Engine | VFX Tutorial
Hello everyone! I am Asif Ali, and you’re watching CGHOW. Today, I’m going to show you how I created this hit impact and bloody effect where a monster bursts out with blood and mesh on impact. Let’s dive in and see how it’s done!
Before we begin: Don’t forget to subscribe to my channel and hit the bell icon so you don’t miss any of my upcoming tutorials!
Effect Breakdown:
In this tutorial, I’m using a delay for the blood effect, triggered by the animation of a monster. Here’s a detailed breakdown of each component:
- Monster Animation & Timing:
- The monster walks and then disappears after a 4-second animation (downloaded from Mixamo).
- The hit effect starts with a delay of 3.8 seconds, timed perfectly with the animation.
- Blood Effect on the Ground (Decal):
- The blood decal material is a variation of a frozen texture I created earlier. I simply changed its color from white to red.
- The material is applied to a planar mesh and multiplied with the particle, saturating it for color variation and eroding it over life.
- Blood Drops (Part 1):
- After the hit, blood bursts in drops, which are controlled by a Niagara emitter.
- Particles spawn with a random life and velocity, and gravity pulls them downward.
- I use a 3×3 sub UV animation texture for the blood drops.
- Blood Drops (Part 2):
- A duplicate of the previous drop is created with similar settings, but this time using a blood splatter material.
- The dynamic parameter erodes the material over the life of the drop, creating a more realistic spread.
- Spreading Blood (Part 3):
- A third variation of blood drops is spread horizontally by adjusting the velocity along the X-axis.
- This creates a more dynamic and chaotic spread effect on the ground.
- Body Part Erosion:
- For the body part, I use a static mesh of a zombie that erodes over time.
- The material erodes with a noise texture, and the body part interacts with the world using collision and gravity settings.
- Mist Effect:
- To add some extra flair, I added a puff of mist that appears as part of the blood impact.
- This mist is created with a cloud texture and a random velocity, filling the space to enhance the overall effect.
- Projectile Trail:
- The projectile trail is animated using a sphere and velocity settings along the Y-axis.
- A ribbon texture is applied to the trail, creating a nice flowing motion as the projectile moves.
Viewport Breakdown:
Let’s take a look at the full effect in the viewport:
- Decal: Blood appears on the ground.
- Drops: Blood bursts in drops, followed by spreading blood and body parts.
- Mist: A mist is created to fill the scene.
- Projectile & Body: The projectile hits, and the body part erodes, leading to an intense and dynamic scene.
Customization Tips:
You can modify this effect by:
- Changing textures for the blood or body parts.
- Adding additional debris, like skulls or limbs, to make the effect even more gruesome.
- Adjusting the particle system to get the desired look for blood splatters, drops, and mist.
I hope you found this tutorial helpful and learned something new! If you have any questions or want to share your version of this effect, feel free to comment below.
Don’t forget to:
- Like, share, and subscribe
- Support me on Patreon (link in the description)
Thanks for watching, and keep learning!
— Asif Ali
Tags:
- Unreal Engine VFX
- Niagara
- Blood Effects
- Hit Impact Tutorial
- Unreal Engine Particle Systems
- Game VFX Tutorial
- Asif Ali VFX
Leave a Reply