

Download – https://www.patreon.com/posts/61620500
Ref – https://bit.ly/3rML8YD
👉👉 If you Liked it – http://bit.ly/2UZmiZ4
Channel Ashif – http://bit.ly/3aYaniw
Support me on – https://www.patreon.com/Ashif
Support me on – paypal.me/9953280644
Projectile In UE4 Niagara Tutorial | Download Files
#cghow #UE5 #UE4Niagara #gamefx #ue5niagara #ue4vfx #niagara #unrealengineniagara #realtimevfx
●Upload Your Tutorials/Work – https://cghow.com/
Purchase Effect Package From Unreal engine Marketplace –
Unreal Engine Niagara Effects in Marketplace – https://youtu.be/DF4Lb_btEus
Niagara Effects Pack in Marketplace – https://youtu.be/g6_k8T7FqHA
Unreal Engine Advanced Magical Effects in Marketplace – https://youtu.be/0Dn3GLIzhMo
Smoke in UE4 Niagara Pack01 in Unreal Engine Marketplace – https://youtu.be/38BPA_9yqJ8
UE4 Niagara Fire Pack 01 in Marketplace – https://youtu.be/PW5FL-zZoP4
UE4 Niagara Fire Pack 02 in Marketplace – https://youtu.be/fdLXPlUEzxM
UE4 Niagara Explosions Pack 02 in Marketplace – https://youtu.be/dj-XX9he4aE
Unreal Engine Niagara Effects Pack 03 in Marketplace – https://youtu.be/0kKon43I-Og
Slow Motion Explosion in UE4 Niagara Pack 04 in Marketplace – https://youtu.be/lUK1eW5zRP0
Unreal Engine Niagara Effects pack 04 in Marketplace – https://youtu.be/MihWYB31Gi4
Slow Motion Explosion in UE4 Niagara Pack 04 in Marketplace – https://youtu.be/lUK1eW5zRP0
UE4.25 Niagara Effects Pack 05 in Marketplace – https://youtu.be/sn1HIENVTDI
UE4.25 Niagara Effects Pack 06 in Marketplace – https://youtu.be/pvH_xGQ5jvs
Explosions Package in Unreal Engine Niagara Particle System – https://youtu.be/1mbqWscjUJ4
●Follow FB Page – https://www.facebook.com/cghow0/
●Join FB Group – https://www.facebook.com/groups/cghow/
●Android App – http://bit.ly/2XUnhoR
Playlists-
●Unreal Engine Niagara Tutorials – http://bit.ly/2SmPEuT
●Unreal engine VFX Tutorials -http://bit.ly/2JNXyJZ
●Unity VFX Tutorials – http://bit.ly/2XNGlKz
Intro
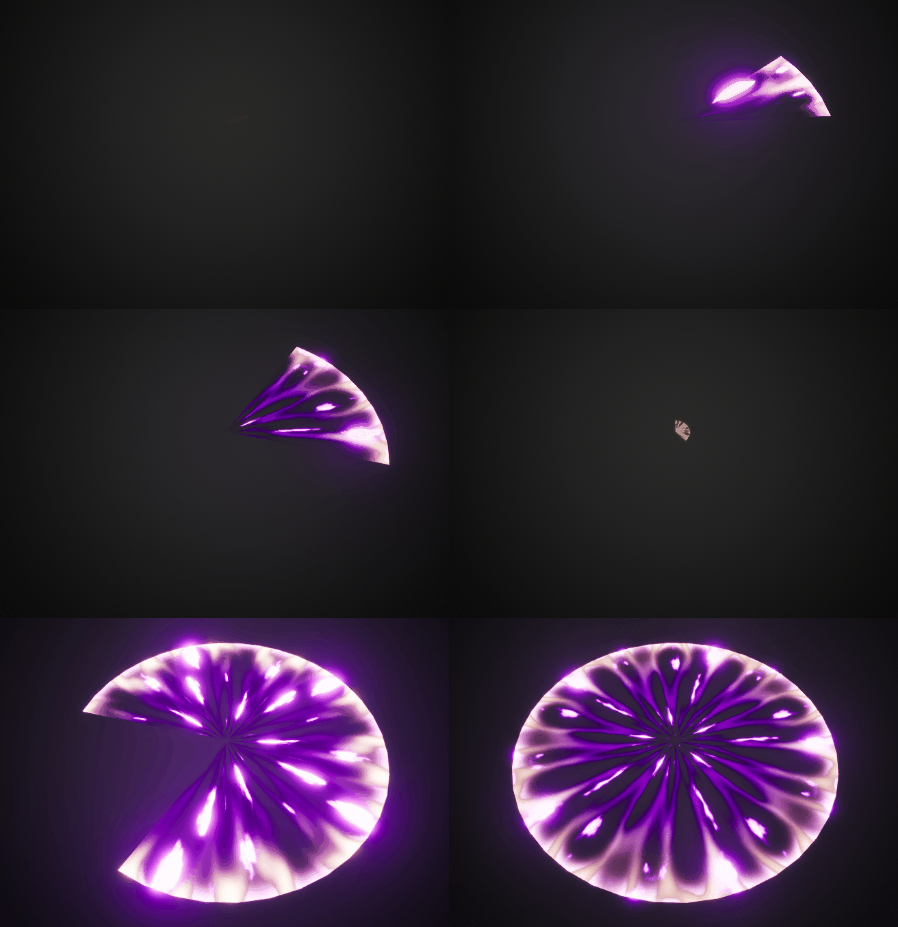
Hi guys, I’m Asif Ali, and you’re watching CGHOW. In today’s video, I’ll show you how to create this projectile effect. I’ll walk you through the process, from creating the base mesh to adding parameters that make it wider and eventually form a full circle. Let’s get started!
If you haven’t subscribed yet, please do so, and don’t forget to hit the bell icon for notifications. Like, share, and comment if you enjoy the video. Thanks for watching!
Tutorial Steps:
1. Getting Started:
- First, let’s take a look at the reference image I got from Pinterest for the projectile. You can see it has a core, a purplish layer, blue layer, and stars.
- You can either create these in a single material or separate them for better control.
- I’ll be creating it in layers for this tutorial.
2. Mesh Creation in Maya:
- I start by creating a simple disk mesh in Maya.
- Delete the top and bottom of a cylinder to create the disk shape.
- Scale and normalize the UVs.
- Use multiple segments for smoother results.
- Export the mesh to use in Unreal Engine.
3. Setting Up the Material:
- I’ll create a new material and apply the disk mesh to it.
- Use texture coordinates and connect them to the emissive channel.
- Adjust opacity and mask out areas to control the appearance.
- Add parameters for opacity control (e.g., using step functions and power nodes).
4. Adding Layers:
- First, I’ll add the core, a glowing central effect.
- For the purplish layer, I’ll use a noise texture and animate it for the desired effect.
- Add opacity control to make the layer fade as it moves.
- Duplicate the material to add the blue layer and stars, modifying textures and opacity settings for each layer.
5. Adding Dynamic Parameters:
- I’ll set dynamic parameters to control various effects like panning, texture offsets, and scale.
- Add a timeline and curves to animate these properties for more control over the projectile’s behavior.
6. Refining the Effect:
- To make the edges smoother and the animation better, I will fine-tune the material settings, adjusting colors, opacity, and animation curves.
- Duplicate and tweak the materials to achieve the desired look.
7. Final Adjustments:
- I’ll animate the disk’s scale for added visual effect.
- Set up a dynamic parameter for the width of the projectile, allowing real-time changes.
8. Testing the Effect:
- After setting up all the materials, dynamic parameters, and animations, I’ll test the effect in the viewport to see how it behaves.
- Fine-tune the scale and animation timing to match the reference.
Conclusion:
- That’s it! Now you have a fully functional and customizable projectile effect.
- I’ll be uploading the project files on my Patreon if you want to download and explore them further.
- Thanks for watching! Keep learning and experimenting. Don’t forget to like, share, and subscribe!
Leave a Reply