

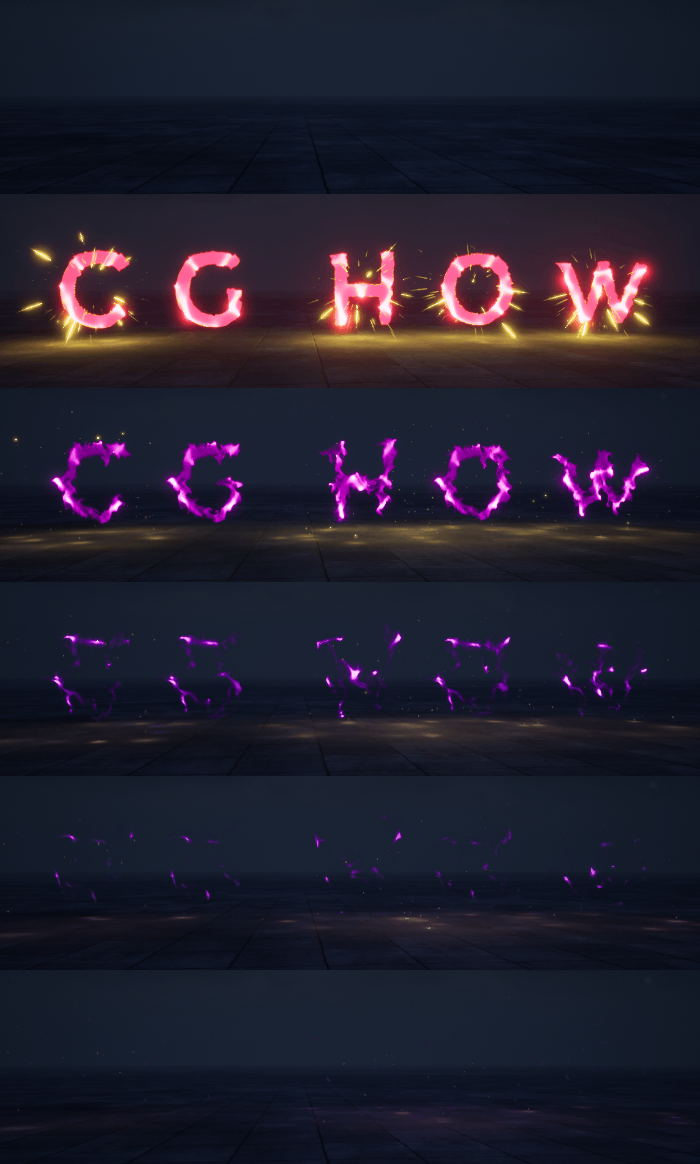
In this tutorial you will learn how to create Smoke Text Effect in unreal engine. you will learn every step for this effect texture, materials, mesh and emitters. For any concern comment below the video or create help thread in CGHOW form (discussion & help forum link below)
#cghow #unrealengine #gamevfx #gamefx #ue4vfx #ue4fx #niagara #unrealengineniagara #unrealenginevfxtutorials
●Upload Your Tutorials/Work – https://cghow.com/
…………………………………………………………………………………………………………
Purchase Effect Package From Unreal engine Marketplace –
●Niagara Effects Pack – http://bit.ly/2LWgZTx
●Advanced Magical FX – http://bit.ly/2XQYyXL
……………………………………………………………………………………………………………………………………
●Patreon – https://www.patreon.com/Ashif
……………………………………………………………………………………………………………………………………
●Follow FB Page – https://www.facebook.com/cghow0/
●Join FB Group – https://www.facebook.com/groups/cghow/
……………………………………………………………………………………………………………………………………
●Android App – http://bit.ly/2XUnhoR
……………………………………………………………………………………………………………………………………
Playlists-
●Unreal Engine Niagara Tutorials – http://bit.ly/2SmPEuT
●Unreal engine VFX Tutorials -http://bit.ly/2JNXyJZ
●Unity VFX Tutorials – http://bit.ly/2XNGlKz
……………………………………………………………………………………………………………………………………
●Discussion & Help Forum – http://bit.ly/2Lo0Er7
……………………………………………………………………………………………………………………………………


Creating a Smoky Text Effect with Sparks and Flash in Unreal Engine Niagara
In today’s tutorial, I’ll show you how to create a stunning smoky text effect with glowing sparks and flashes using Unreal Engine Niagara. I’ve broken the effect down for each letter so you can customize it for any text you wish. Let’s dive into how I created the smoky C-text effect, which you can easily modify for the other letters.
Key Components of the Effect:
- Smoky Text Shape:
- Material: The key to the smoky text effect is using a sub UV material. Each letter is animated with sub UV frames to simulate the smoke, and I’ve applied an aura texture to give the center of the text a glowing effect.
- Creating the Sub UV: To generate the sub UV texture, I used a fluid container in Maya, emitting smoke from the shape of each letter. This was rendered as a sequence and then converted into sub UV textures using the GlueIt software. The final texture is imported into Unreal Engine as a 9×9 grid, which is then animated.
- Particle Settings: A single particle is spawned for each letter (e.g., for ‘C’). The particle size is set to 500, and the color is animated from yellow to pink to purple. This helps create a soft, smoky look that moves and changes over time.
- Flash Effect:
- Material: The flash uses a radial ramp texture that has been subtracted from the center, leaving a blank area for the flash effect. It is then connected to opacity and emissive channels.
- Particle Setup: The flash emits three particles with a very short life, and the size is randomized. The color of the flash transitions from yellow to red. This effect gives a sudden burst of light when the text appears.
- Sparks:
- Material and Movement: The sparks start by stretching and then gradually become small dots as they fall. They are emitted using a radial ramp, and each spark is connected to a light source (radius 20). The sparks are colored based on the particle’s color, transitioning from yellow to purple.
- Physics and Movement: The sparks are given an omni-velocity to spread them in all directions. Negative values for point attraction cause the sparks to spread outwards, and gravity pulls them down as they fade.
- Stretching and Scaling: The sparks are initially stretched using velocity alignment, allowing the particles to elongate in the direction they are moving. The stretching is controlled with a sprite scale size curve, making the sparks appear stretched at the start and then shrink into dots.
Workflow Overview:
- Text Creation:
- I used Maya to create fluid simulations for each letter, which were then rendered as sequences. Each letter (C, G, H, W) is created separately but follows the same principles for the effect.
- Sub UV Texture Creation:
- Using GlueIt, I created the sub UV textures for each letter (9×9 grid) and imported them into Unreal Engine. The effect is animated using these frames.
- Material Setup:
- I created custom materials for the flash, sparks, and smoke, which I then applied to the particle systems in Unreal Engine.
- Customization:
- You can easily modify the color of the sparks, change the flash intensity, or apply different sub UV sequences for other letters (like G, H, and W). Each text can be independently customized while maintaining the same overall effect.
Conclusion:
This effect is simple yet dynamic, with glowing flashes, falling sparks, and smoky text that can be adapted to any word or letter you like. It combines various elements of particle systems, lighting, and material design to create a visually appealing result.
If you enjoyed this tutorial, be sure to like, comment, and subscribe for more Unreal Engine tips and tricks. If you have any questions or need further clarification, leave a comment below. And don’t forget to support me on Patreon via the link in the description!
Thanks for watching, and keep learning!
Leave a Reply