
Support me on – https://www.patreon.com/Ashif
Support me on – paypal.me/9953280644
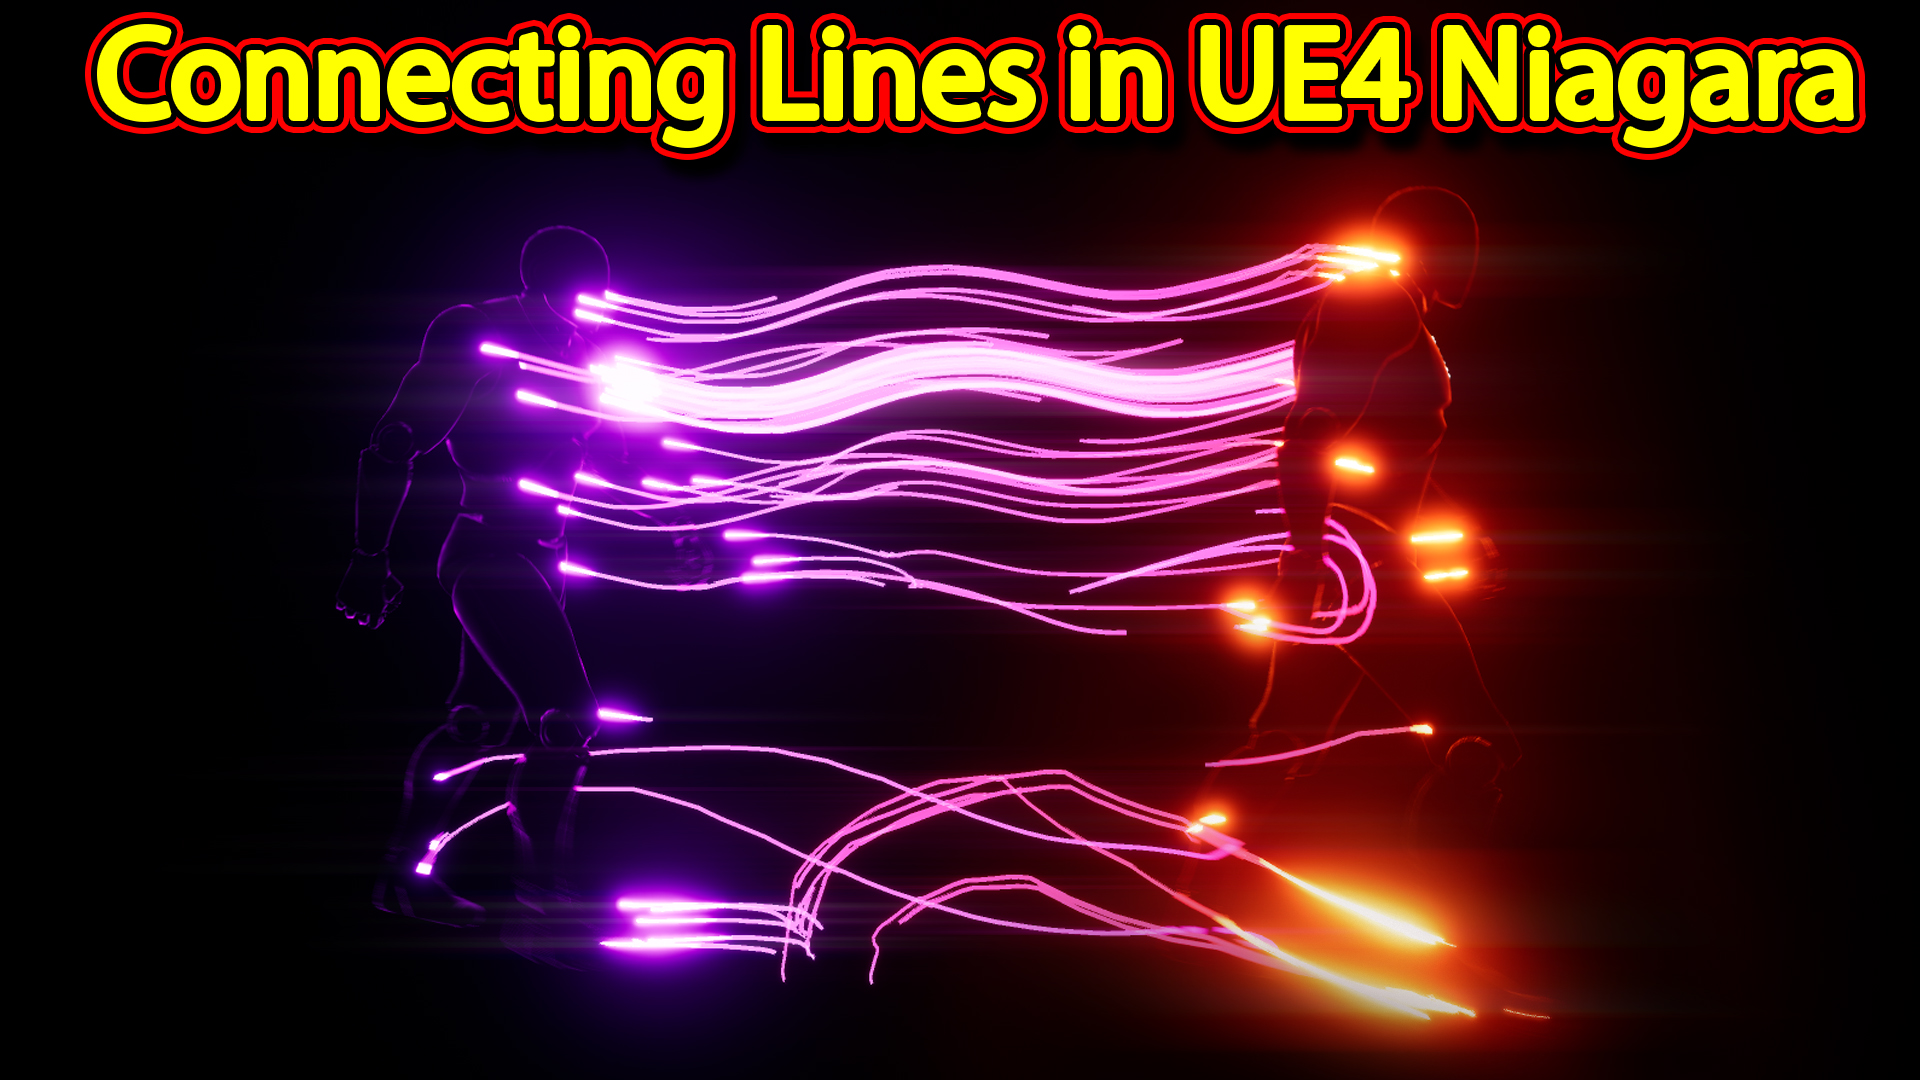
Hi guys today i have created this cool looking connecting lines effect in unreal engine Niagara, and its so simple to make just follow this tutorials and download project files from patreon.
#cghow #RealtimeVFX #UE4Niagara #gamefx #ue4vfx #ue4fx #niagara #unrealengineniagara #unrealenginevfxtutorials
●Upload Your Tutorials/Work – https://cghow.com/
…………………………………………………………………………………………………………
Purchase Effect Package From Unreal engine Marketplace –
●Niagara Effects Pack – http://bit.ly/2LWgZTx
●Advanced Magical FX – http://bit.ly/2XQYyXL
……………………………………………………………………………………………………………………………………
●Patreon – https://www.patreon.com/Ashif
……………………………………………………………………………………………………………………………………
●Follow FB Page – https://www.facebook.com/cghow0/
●Join FB Group – https://www.facebook.com/groups/cghow/
……………………………………………………………………………………………………………………………………
●Android App – http://bit.ly/2XUnhoR
……………………………………………………………………………………………………………………………………
Playlists-
●Unreal Engine Niagara Tutorials – http://bit.ly/2SmPEuT
●Unreal engine VFX Tutorials -http://bit.ly/2JNXyJZ
●Unity VFX Tutorials – http://bit.ly/2XNGlKz
……………………………………………………………………………………………………………………………………
●Discussion & Help Forum – http://bit.ly/2Lo0Er7
……………………………………………………………………………………………………………………………………


Video Title: Creating Connecting Lines Effect in Unreal Engine Niagara
Description:
In this tutorial, Asif Ali from CGHOW demonstrates how to create a cool connecting lines effect in Unreal Engine using Niagara. The effect might look complex, but it’s incredibly simple to create. Watch as Asif takes you through the process from scratch, explaining how to spawn particles, generate trails, and use basic materials to connect them in an animated scene.
Key Points:
- Basic Setup:
- Begin by setting up a black map and adding a walking mannequin for animation.
- Use the mannequin’s animation to drive particle effects, spawning them on the character’s skeleton mesh.
- Creating the Particles:
- Set up a spawn rate for particles and add them to the character mesh.
- Use Niagara to simulate particles attached to the character for real-time effects.
- Duplicate particle systems to create different behaviors (trails, lines).
- Trail Effect Setup:
- Add a ribbon renderer for the trail effect.
- Apply a ribbon material to the trails for visualization.
- Adjust velocity to move the particles in the desired direction (backwards).
- Fine-tune the particle spawn rate and life for a smooth trail.
- Connecting the Particles:
- Use the location of the particles to generate trails between them, ensuring they follow the animation.
- Add color changes (e.g., red, purple) for visual appeal.
- Introduce a “hot part” effect at the connections of the trails for added realism.
- Final Adjustments:
- Modify the color curve to change the visual appearance of the trails.
- Make minor tweaks to achieve the desired look for the connecting lines effect.
- Advanced Tips:
- Use persistent IDs to maintain particle locations.
- Add velocity adjustments for directional control.
- Duplicate the particle system to simulate a continuous connecting effect.
Trendy Tags:
#Niagara #UnrealEngine #VFX #ParticleSystem #ConnectingLines #TrailEffect #UnrealEngineTutorial #CGHOW #VFXTutorial #RibbonEffect #Particles #GameEffects
Additional Notes:
- The tutorial is very simple, but the result looks amazing, and it’s great for learning how to create basic connecting lines or trail effects in Unreal Engine.
- Asif offers the final project file on his Patreon, so you can download and explore the effect.
- While the effect is basic, it can be customized and used in various scenarios to create dynamic visual connections in your game or animation.
Leave a Reply