
Patreon- https://www.patreon.com/Ashif
NFT – https://opensea.io/CGHOW
Twitter – https://twitter.com/cghow_
👉👉 If you Liked it – http://bit.ly/2UZmiZ4
Channel Ashif – http://bit.ly/3aYaniw
Support me on – paypal.me/9953280644
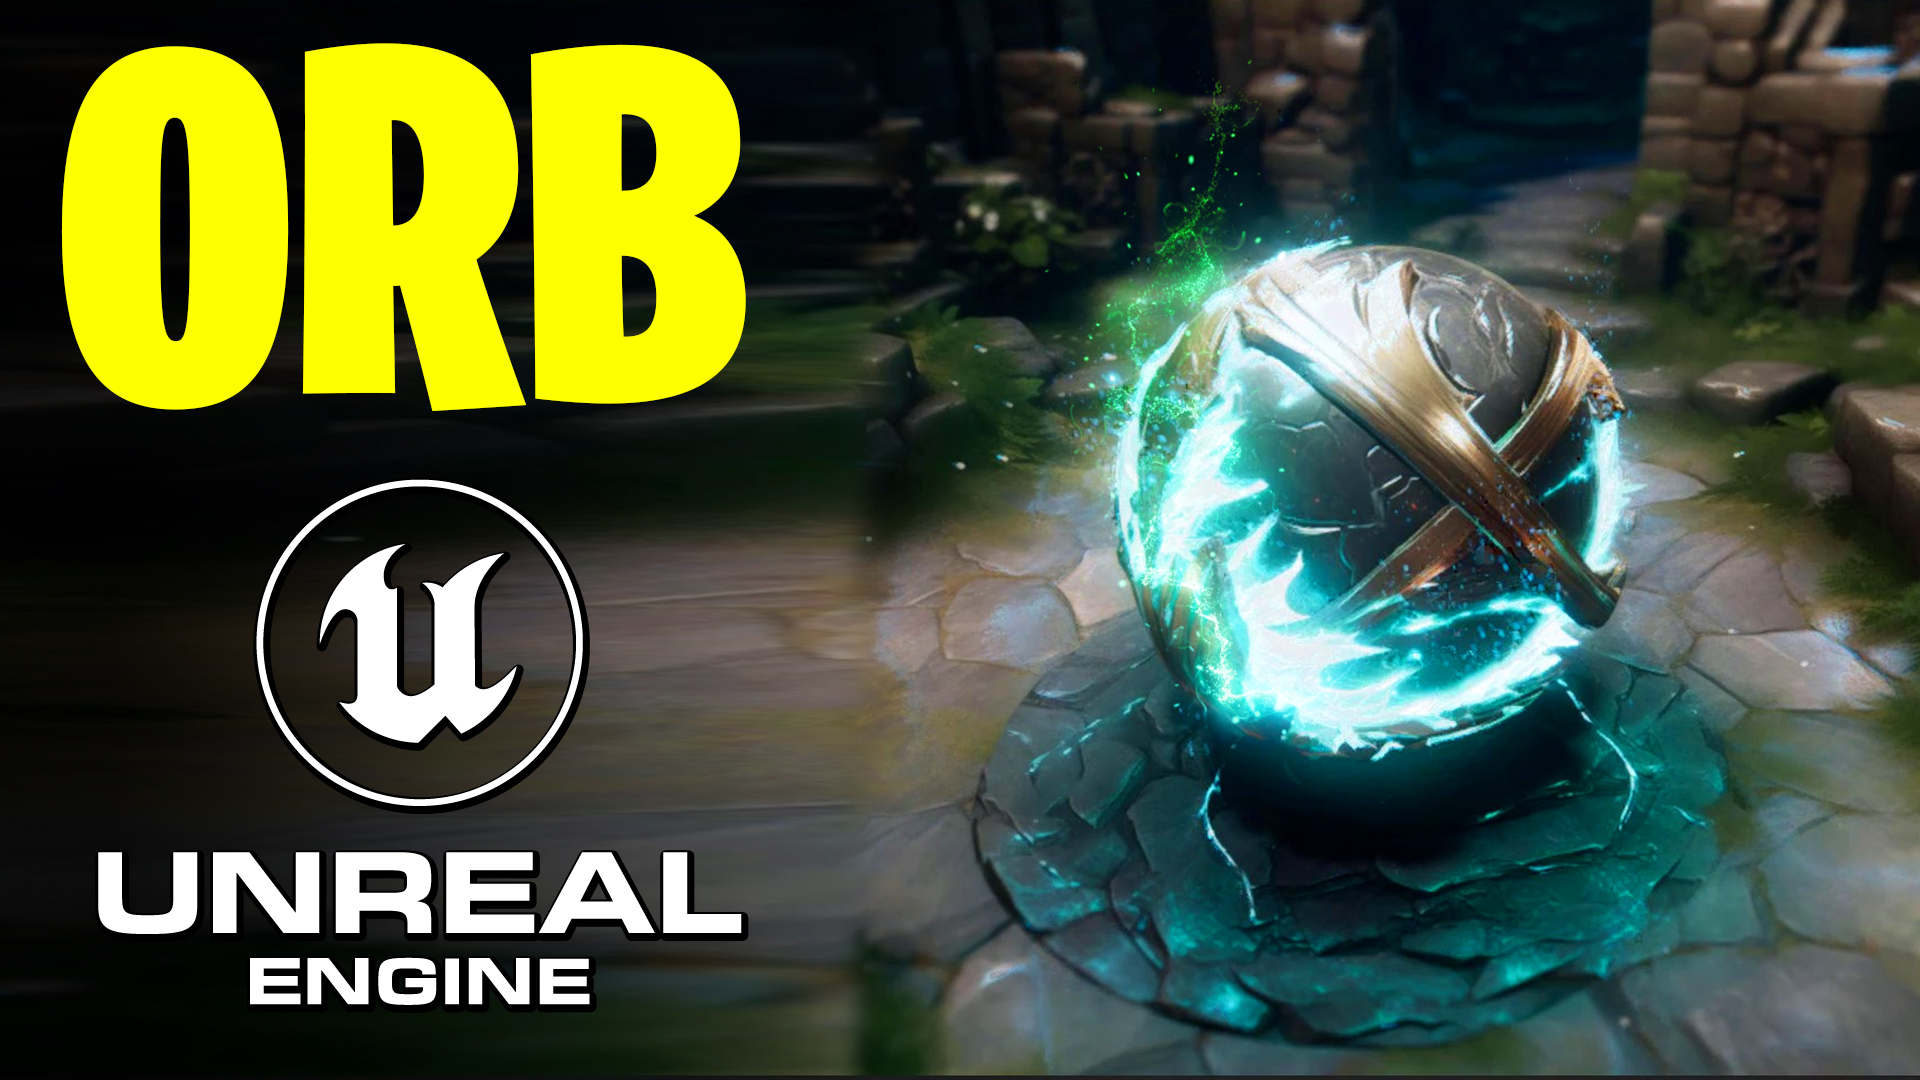
UE5 | ORB in Unreal Engine 5.2 Niagara Tutorial
#cghow #UE5 #UE4Niagara #gamefx #ue5niagara #ue4vfx #niagara #unrealengineniagara #realtimevfx
●Visit – https://cghow.com/
Unreal Engine Marketplace – https://bit.ly/3aojvAa
Artstation Store – https://www.artstation.com/ashif/store
Gumroad – https://cghow.gumroad.com/
Creating Particles from an Image in Unreal Engine using Photoshop and Niagara
In this tutorial, we’ll show how to extract particles from an image using Photoshop and import them into Unreal Engine’s Niagara system to create dynamic particle effects.
Steps Covered:
- Exporting and Preparing the Image:
- The first step is to export a static image, focusing on the blue part that will serve as the base for the particles. This image was exported to the desktop, where it’s opened in Photoshop.
- Channel Selection: In Photoshop, select the blue channel, as it is the primary part from which we’ll create the particle effect.
- Masking: The blue channel is copied and pasted, and the area to be used for particles is masked out.
- Image Modification and Saving:
- After masking out the necessary parts of the image, the blue region is isolated. The image is saved with a “mask” added to the name.
- Saving the Image: The modified image is saved on the desktop for later use in Unreal Engine.
- Creating the Material in Unreal Engine:
- Material Creation: A new material is created in Unreal Engine. The image is imported into this material and connected to the emissive channel, ensuring it’s set to unlit.
- Saving the Material: The material is saved for use in Niagara.
- Setting up Niagara:
- Emitter Creation: In Niagara, a new emitter is created, and a fountain effect is used as a base. The particle count is reduced to one, and unnecessary elements (like random motion) are removed.
- Particle Texture: The newly created material is assigned to the particles, and a custom facing vector is used to ensure that particles face the camera properly.
- Adjusting Particle Properties: Particle size and other attributes are adjusted to make the effect fit within the blue part of the image.
- Masking with a Custom Scratchpad Module:
- A custom scratchpad module is created to sample the texture and ensure particles are emitted only from the masked blue region.
- Alpha Channel for Masking: The mask created in Photoshop is used to control which particles appear based on the alpha channel.
- Texture Sampling: The UV coordinates are modified to match the mask and ensure correct particle positioning.
- Fine-tuning the Particle Effect:
- The spawn rate and particle size are adjusted to match the blue part of the image.
- Particles are animated and given a curving noise effect to add realism to the motion.
- Camera Offset: The camera’s movement is taken into account for particle motion, ensuring a smooth and realistic effect.
- Final Adjustments:
- Particle Kill Logic: Particles are killed outside the masked area using a comparison of the alpha values.
- The particle color is adjusted, and further noise effects are added to distort the particles for more organic movement.
- Material Tweaks: A second material is created, desaturated and inverted to further distort the particles, adding more variation.
- Dynamic Parameters:
- Dynamic parameters are used in the material to control effects like power and panning.
- The dynamic parameters can be manipulated in real-time to adjust the look of the particles during gameplay.
Final Result:
- After all the adjustments, the image now looks “alive” with dynamic particles emerging from the blue part of the image.
- The particle effect is finalized with optimized settings for performance and visual appeal.
Leave a Reply